Posts tagged: BBQ
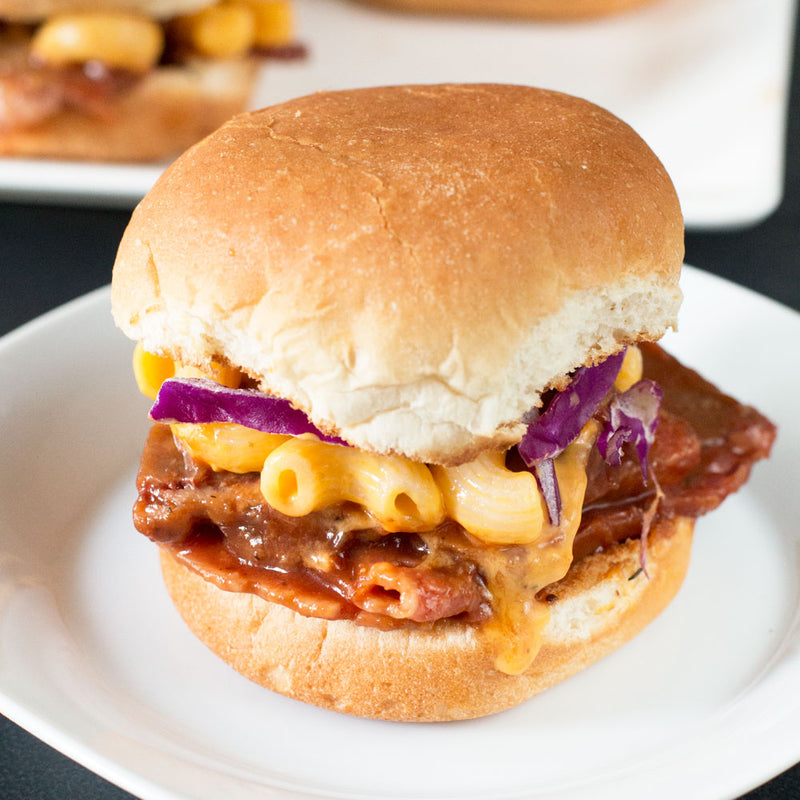
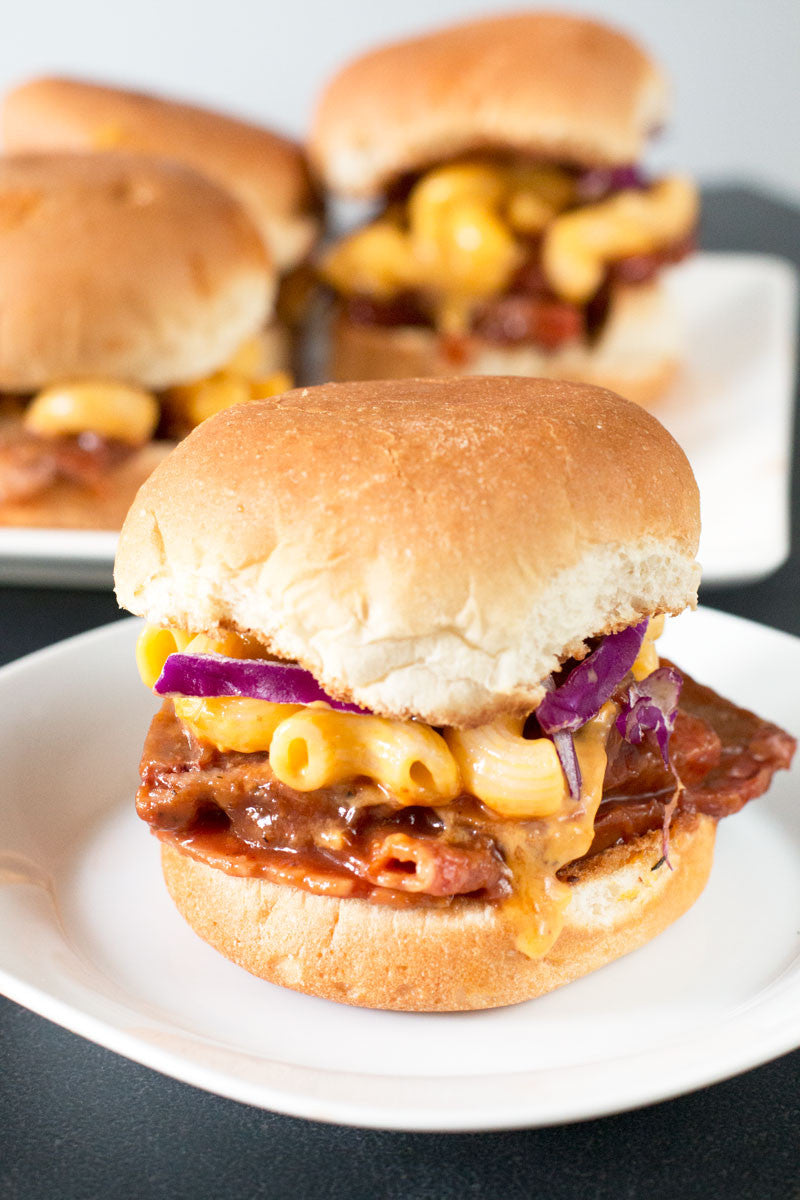
Brisket Mac N Cheese Sliders
You know when you have leftovers hanging around and you have ZERO idea what to do with them? My refrigerator is usually a mash up of random BBQ leftovers, some pasta and whatever else I happen to have leftover from last night's BBQ party. There's a limit to how many times you can eat the same dish the same way. I mean, I love my brisket, but after a couple of nights of just brisket and a side salad, I'm getting bored.

I also happen to be lazy and have no desire to actually get too terribly creative unless I know it'll take me zero extra effort. Enter these little brisket mac n cheese sliders... Brisket Mac N Cheese Sliders are the new appetizer that you have absolutely no excuse not to make. Seriously, how easy are these little guys? You just throw some leftovers on a toasted bun and BAM, you have a completely new way to eat that brisket and mac n cheese that have been taking up valuable real estate in your refrigerator.

Plus, how fancy you get with this recipe is completely up to you. You can make your own smoked brisket or you can head over to Pig of the Month's shop to snag some of their oh-so tender brisket. For the mac n cheese, you can simply make these sliders with store-bought mac and cheese, or you can bust out grandma's favorite recipe to go the extra mile. Regardless, these sliders are just the right balance of meat and cheese to hit the spot with every bite. There's no going back once you've eaten these sliders, so get prepared to start craving mac n cheese on your sandwiches from here on out. Don't say I didn't warn you...

INSTRUCTIONS - Watch the video below!
Pig of the Month BBQ on Vimeo.
Shop This Post
Recipe, video & photos by Meghan Bassett

Grilling 101: The Best Way to Make Juicy Grilled Chicken


You know that magical juicy chicken you dream of getting hot off the grill in your very own backyard? It ain't as easy to make as you think. We hear it all the time - "how do I grill chicken breasts and keep them moist?" "Is there any way to avoid dry chicken? Help!" You asked BBQ-loving peeps and we are here to answer your grilling prayers. Just follow the crazy simple steps below and boom, just like that you'll be the envy of the entire neighborhood. Get that grill master cap ready...

First, use the bottom of a wide jar or glass (or even a small skillet) to flatten those chicken breasts in an even thickness. You don't need to pound them to super thin cutlets, just make them even. Now, brine that bird! Even a mere 30 minutes in a salty brine or marinade will make all the difference - plus you need time to fire up the grill anyway 😉

An easy brine is super salty water with a dash of black peppercorns will do the trick, or go fancy with a marinade for a couple of hours. Either way, make sure you are letting the chicken rest in the brine or marinade for at least 30 minutes.

Once the grill is hot, oil it up and grill the chicken breasts over medium high heat, approximately 350 to 425 degrees. Make sure they are over direct heat and grill them for just a few minutes per side. Fast and hot gives you a good sear and keeps the meat nice and juicy. When the meat reaches 155 degrees, remove it from the heat and let it rest. Don't worry, it'll keep cooking and reach that safe zone of 165 degrees while it rests. Just don't cut it too soon or you'll lose those tasty juices! Serve with any Pig of the Month BBQ sauce, chimichurri, or salsa. Happy grilling folks!
Grilling 101: What Temperature Do I Grill That At?
Becoming a grill master is everyone’s goal during the summer. You want to be the man/gal with the plan when the grill is firing up and all those tasty meats, veggies and fruits are heading for those killer grill marks. If you are hoping to be a better griller this summer, the first thing you have to master is the heat of your grill. Every grill can be different, but the real key isn’t nailing a specific temperature, it’s getting the foods on the grill in the right order. Slamming some delicate fish on a blazing hot grill isn’t going to give you that flaky tastiness you want, just like throwing a steak on indirect heat isn’t going to deliver the juicy, tenderness. Feeling overwhelmed yet? No worries, we’ve got you covered. Here’s the complete guide to knowing exactly what temps the top grilling foods need to hit the grill at.

Fire up those grills, ladies and gents. You GOT this.
Summer Sippin' Cocktails
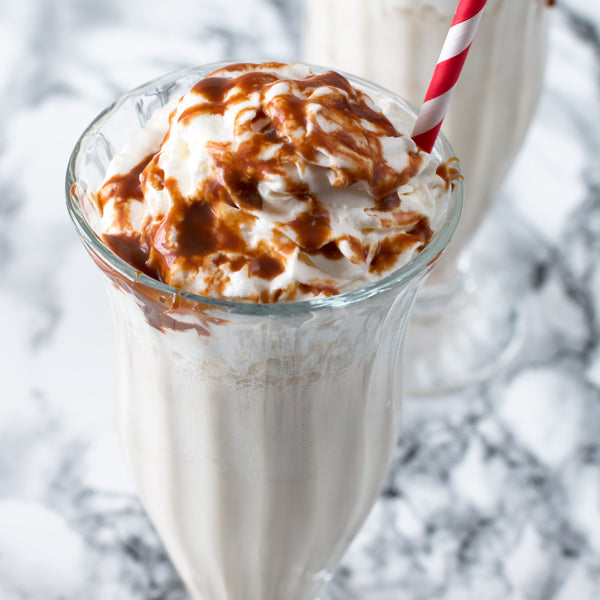

Summer grilling season is in high gear and that means just one thing around here… It’s time to break out some serious summer cocktails to cool off with while standing around the grill all afternoon. Backyard BBQs are a way of life whenever the sun is out and we can’t lie, we get a little tired of the beer and wine after the first few get togethers. So we are upping our cocktail game this summer with some seriously refreshing, oh-so addictive recipes to beat that summer heat. There’s a little bit of everything in here whether you are a tequila-lover, or you’ll only drink fresh fruit cocktails all summer long. The only question is, which one should we try first….?

Pineapple Mint Cooler - Honestly Yum Watermelon Shandy - How Sweet It Is

Bourbon Caramel Milkshake - Sauce + Style Pink Grapefruit Margarita - A Spicy Perspective

Rhubarb Fennel & Vermouth Cocktail - Honestly Yum Mango Mojito - Sauce + Style Spicy Michelada - A Spicy Perspective
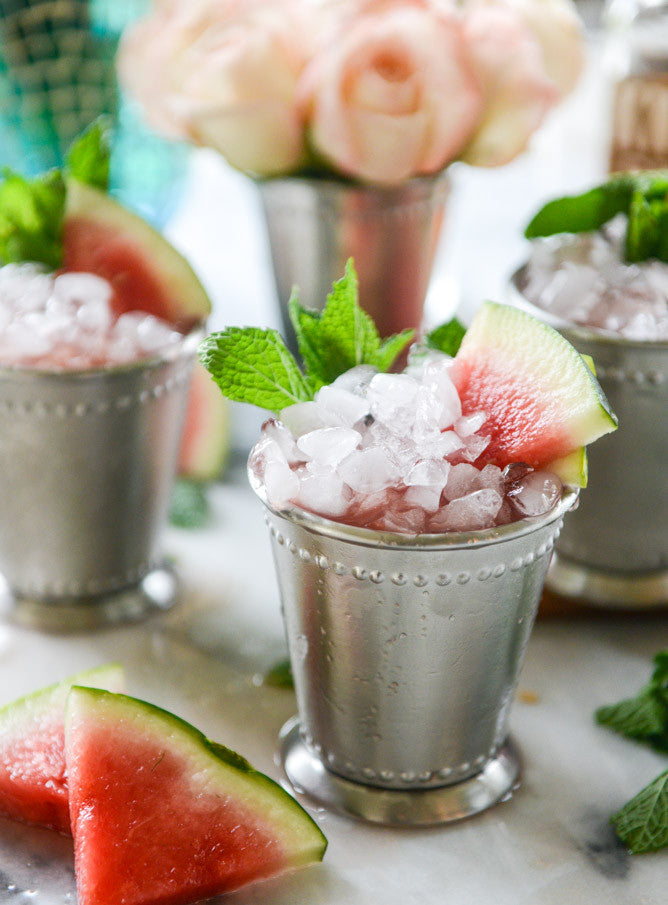
Fresh Watermelon Mint Juleps - How Sweet It Is Frozen Strawberry Margarita - The Little Epicurean Strawberry Rhubarb Margarita - Sauce + Style

Pomegranate Mojito - Drizzle & Dip Rose Sangria - How Sweet It Is Mojito Popsicles - Sauce + Style Cheers to the freakin’ summer piggy peeps! Happy drinking!
Grilling 101: Top Questions Answered!

If you’re anything like us, you’re already busting out the charcoal and grilling ALL the things. Whether you are grilling up ribs, veggies or a whole lot of burgers and hot dogs, there’s nothing better than the smell of burning coals and smoke. We get all sorts of grilling questions every year, from gas or charcoal preference to how to clean the grill. So this year we’re going to be covering a ton of grilling recipes, techniques and tips and tricks throughout the summer! To kick things off, we’ve rounded up our most-asked grilling questions. Before you fire up those grills again, get to know your stuff!

What’s better gas or charcoal? This is the ultimate grill question we get! There are a few factors that come into play to help you decide. First, price. Gas is more complicated and will cost more because of all the moving pieces inside the grill. Charcoal is a simpler grill so it will always be substantially cheaper. Second deciding factor? Taste. Gas burns clean so you’ll get the char marks, but you won’t get any special flavor in your food like using charcoal will get ya. Of course, gas grills will get to temperature faster and charcoal grills tend to take a long time to get hot. Gas grills are also a lot easier to clean up since charcoal grill cleaning can send ashes scattering all over the place. That’s a lot of back and forth, you guys. Yea, we know. If you want our honest opinion, charcoal always wins out when it comes down to it. You get better flavor, better heat management and you aren’t forking over as much money. When in doubt, go with the coal. Do I need to preheat my grill? YES. You need to preheat your grill whether you are using a gas or charcoal grill. A good rule of thumb is about 15 minutes for high temperatures (i.e. for searing) or 10 minutes for lower temperatures (i.e. for fish and such). Getting that preheat done before you start grilling the food will also help remove some of the residue left on the grill from past cooking.

How do I season my new grill? Oooohhhh look at you with your new killer grill! You are probably itching to get to grilling, but you have to season that baby first. No one wants the new grill residue on their food, trust us. Start with a cold grill and rub all the cooking surfaces down with canola oil. Wipe off any excess oil with a paper towel and light the grill. Let the grill heat up for about 15 minutes, or until the oil starts burning off and smoking. At this point the shiny finish that came with the grill should be turning dark brown or bronze. Turn off the grill and once coal, add a light coat of oil. To keep your grill in tip top shape, repeat this last light oil application step after each time you grill. Why you should never ever use lighter fluid...ever It’s all about the taste and smell. If you use lighter fluid, you’re going to get all those chemicals on your food. It’s really pointless to use lighter fluid when you can use a chimney starter so easily. Plus no one wants to smell like lighter fluid all day. Yuck.

How do I deal with flare-ups? First, get that food off the grill so it doesn’t get charred to oblivion. Then cover it up and wait it out. Flare ups survive off of the oxygen in the air so if you can smother it with the lid of the grill, do that. No matter what you do, DON’T squirt a water bottle on a flare up. It will get an ashy mess everywhere and it doesn’t actually subdue the flare. Be sure to keep an extinguisher nearby though… Just in case. Keep checking the blog for new Grilling 101 features throughout the summer. Your grill master status depends on it.
Don’t forget to check out our featured grilled recipes!


Grilled Chili Rubbed Flank Steak


Lemon Pepper Bacon Wrapped Shrimp Skewers
Recipes & recipes photos by Meghan Bassett
How to Grill Pizza
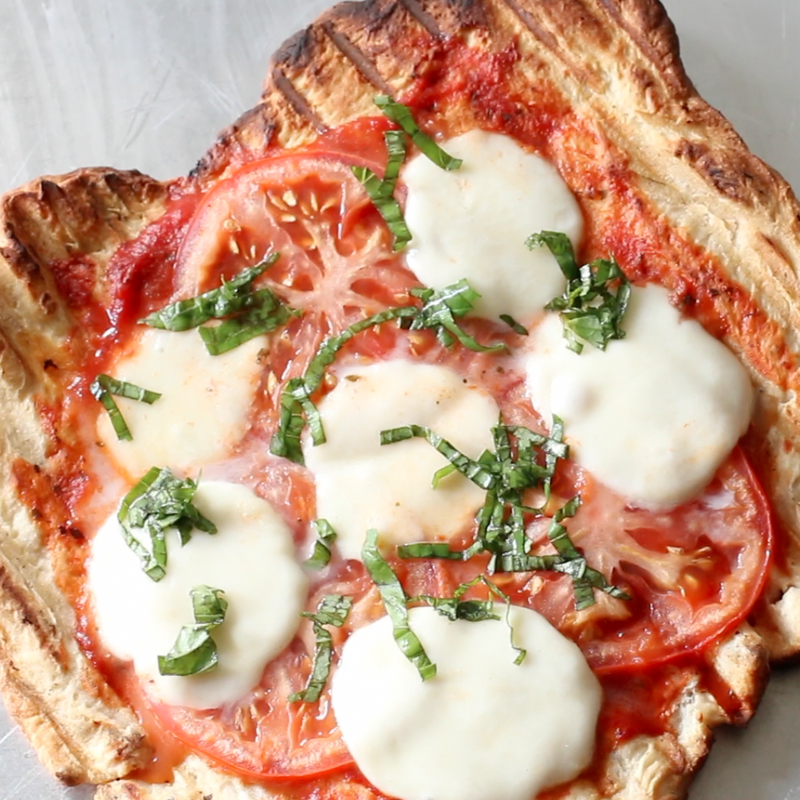
Want that killer grilled pizza at home? Just follow our super simple How to Grill Pizza video!
You might think grilled pizza is a luxury that you can only get when you go out, but you couldn't be more wrong! As long as you have a grill, a rolling pin and some toppings, you are mere minutes away from the best pizza of your LIFE. Grilled pizza is my all-time favorite thing to eat during the summer. The flavor from the charcoals and the crispy texture are totally drool worthy! I always keep some pizza dough in the freezer or refrigerator just for this reason during the summer. You can throw whatever toppings you want to and in about a half hour, you have the best pizza ever - no pizza oven or pizza stone required! Directly on the grill is the only way to do it, am I right? So just follow the video below the recipe card and get to grilling already!

Pig of the Month BBQ on Vimeo
Recipe, Photos & Video by Meghan BassettThe One Trick to Microwave Perfect Bacon
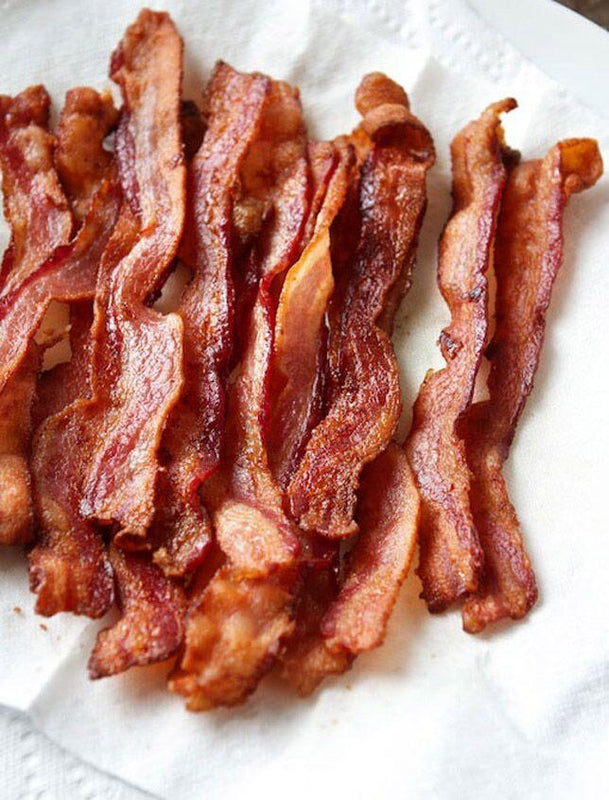

We've all been there in a pinch. The oven is taken, you've got 5 things working on the stove and you still need to cook up some bacon. This is the moment that knowing the one trick to microwave perfect bacon really comes in handy! There may be some naysayers out there that don't believe that microwaving bacon really works. Well, we're here to prove you wrong. If you do it right, you'll get that oh-so crispy, swoon-worthy bacon every time.

So what's the one trick you need to know? It's simple - paper towels. You might be scratching your head right about now - I mean, we don't blame you. What's so special about paper towels? We swear, paper towels really are the key here. They soak up all that extra grease as the bacon cooks in the microwave so you end up with bacon that is anything but soggy. No globs of gross, pathetic bacon here. We respect our bacon WAY too much to let that happen on our watch. Are you ready to know the secret of the paper towel power when it comes to microwaving bacon?

Here's how to do it right, every single time: Step 1: Line a baking dish (one that'll fit in your microwave, of course) with not one, not two, but THREE layers of papers towels. Step 2: Add bacon in a single layer and cover with another two layers of paper towels. Step 3: Microwave the bacon for 1 minute per slice of bacon. Check on it and cook in 30-second additional increments as needed. The price time will depend on the thickness of the cut and how much you are cooking at one time. Step 4: Once cooked through, transfer the bacon to a clean plate (NOT lined with paper towels) so the bacon slices don't stick to the paper towels as it crisps up. Step 5: Enjoy deliciously cooked bacon, right from your microwave! Did we just blow your mind?
Spicy Dry Rub Ribs
Spicy Dry Rub Ribs are smoky and spicy, perfect for your next BBQ gathering! The ribs come out extra tender and juicy, hot off the grill and finger-lickin' good.

It's finally grilling season! Is anyone else as excited as I am about this? I've been busting out the grill almost every single night for dinner and I gotta tell you, that grilled charcoal flavor is what I've been missing since Labor Day. Chicken, vegetables, burgers, steaks, I've been grilling it ALL.

Recently though, I've been obsessed about perfecting dry rub ribs on the grill. I've baked them more times than I can count, but nothing gets that BBQ flavor packed into the ribs like a grill. These ribs are the best combination of spicy and smoky on the outside, with perfectly tender and juicy meat on the inside. Seriously, the meat practically melts in your mouth with every bite.

Your next BBQ NEEDS these ribs. Or even your next weeknight meal! Rub the ribs down and wrap 'em up before you head to work in the morning, then just throw 'em on the grill when you get home. You'll have grilled up ribs in under an hour that'll curb all those BBQ cravings you've been having lately.


INSTRUCTIONS: In a medium bowl, stir to combine salt, brown sugar, paprika, garlic powder, onion powder, chili powder, cumin, black pepper and cayenne pepper.

Rub down the racks of ribs with the dry rub evenly. Wrap the racks in plastic wrap and let rest in the refrigerator for at least 2 hours.

Heat up your grill to 350 to 400 degrees and rub the grill racks with olive oil. Remove the ribs from the plastic wrap and place directly on the grill. Cook for 40 minutes, turning occasionally, until crispy and cooked through.

Allow the racks to rest 10 minutes before cutting into them and serving.

Recipe & photos by Meghan Bassett
Grilled Chili Rubbed Flank Steak
Grilled Chili Rubbed Flank Steak is a super simple way to take your grilled steak to the next level of flavor. The wet rub infuses so much tastiness into the flank steak - you can't go wrong with this one!

Are you ready for Memorial Day?? I am tweaking my menu daily for the annual massive BBQ I host, and I was feeling a little stumped earlier this week. That is, until now. This grilled chili rubbed flank steak changed ev-er-y-thang for me once I made it. It's one of the simplest recipes I've ever created, but in terms of flavor, it's ridiculously complex. All of the flavors in the rub perfectly compliment the meat and that really good charred taste you get from the grill.

You can easily serve this bad boy as is or there are about a million other ideas you could try out. Throw it on a salad. Chop it up and add it to a grilled pizza. Serve it with tons of grilled veggies. You can even make some killer tacos or a Tex Mex inspired sandwich with this meat. The options are limitless and it'll take you less than 15 minutes of active cooking time to make it happen.

So obviously, you should be adding this recipe to your Memorial Day menu right NOW.


INSTRUCTIONS: In a small bowl, combine garlic, lime juice, chili powder, salt, cumin, paprika and cayenne.

Stir until all ingredients are incorporated.

Rub the paste all over the steak. Let rest in the refrigerator for 15 to 20 minutes.

Grill the steak on a hot grill or grill pan over medium-high heat until it reaches your desired doneness (approximately 6 to 8 minutes for medium). Remove from grill and rest for at least 10 minutes before slicing and serving.

Serve alone over rice, with salad or even in tacos! Give it an extra squeeze of lime for a touch of extra brightness too. Recipe & photos by Meghan Bassett
Meat Lovers Pizza Roll Ups
Meat Lovers Pizza Roll Ups are a meat lover's dream! Packed with three different Pig of the Month BBQ meats, you will be in BBQ pizza heaven with every bite.

I have a serious obsession with BBQ pizza as soon as the warmer weather comes around. Aside from grilling everything and anything in sight, I'm all about the easy appetizers or snacks that I can munch on (or turn into a whole meal) while I messing with whatever I have going on the grill. These meat lovers pizza roll ups are my favorite solution for something summer and BBQ-packed that doesn't require me whipping out the grill - or something that doesn't take up that valuable real estate, you know?

Whether you are making these as a snack or appetizer for a party, or turning these into a fun weeknight BBQ meal for the family, you won't find a more meaty recipe out there that's this easy.
All you have to do is roll out some dough, stuff it with meat, bake and top with cheese. Just don't forget the extra BBQ sauce to serve them up with!

Sling me a beer and lets cheers to those tasty, juicy meats!
[vimeo 166821716 w=640 h=360]Meat Lovers Pizza Roll Ups from Pig of the Month BBQ on Vimeo.
INSTRUCTIONS:
Preheat oven to 425 degrees. Grease a baking sheet and set aside. On a lightly floured surface, roll out the pizza dough into a large 9x13-inch rectangle. Brush the dough with 1/3 cup of BBQ sauce. Layer on the pulled pork, brisket and bacon. Roll the dough up tightly and slice in 3/4-inch thick rolls. Add rolls to prepared baking sheet. Bake for 15 minutes. Sprinkle the rolls with cheese and broil until the cheese is melted. Serve immediately with extra BBQ sauce for dipping. Shop This Post Pig of the Month BBQ Pulled Pork Pig of the Month BBQ Brisket Pig of the Month BBQ Applewood Smoked Maple Bacon Recipe, photos & video by Meghan Bassett « Previous 1 2 3 4 Next »
