Posts tagged: Grilling 101
Grilling 101: How to Light a Charcoal Grill

Hey BBQ peeps! Put down the lighter fluid and listen up. It’s about time you quit it with that stuff and learned how to light a proper grill, isn’t it?

Yea, that’s what we thought too. There are some hard and fast rules that you need to know when lighting a charcoal grill. Get to know them, memorize them, and never stray from them. Trust us, we won’t steer ya wrong!

Don’t Use Briquettes There are wayyyy too many fillers and chemicals in briquettes. If you use them, all that nasty stuff is getting into your food and no one wants that. Real hard-wood charcoal is the only way to go - it even burns hotter without the chemicals which is a major bonus. Don’t Use Lighter Fluid Lighter fluid = NO. Repeat that 10 times if you have to in your head. The chemicals in lighter fluid ruin the whole point of using real hard-wood charcoal. Don’t do it. It’s also a major fire hazard and no one wants to go the summer without eyebrows.

Use a Chimney Starter For REAL, folks. This is an easy one. If you’ve never tried lighting one before just follow these steps:
- Stuff 2 pieces of newspaper in the chimney starter.
- Fill the chimney with charcoal.
- Light the newspaper with a match or lighter.
- Remove the grate and set the chimney down in the grill, letting it burn for a bit.
- Make sure there’s smoke coming out of there or else that’s a sign the fire’s died.
- When ready to grill, dump out the coals. If you need a two zone grill for direct and indirect heat, set the coals off to one side when you pour them in (they don’t exactly move around easily once they’re in there!)
Easy right?

Clean Your Grill Clean your grill before you use it, ideally right AFTER you use it each time. Having that leftover ash and residue will block the airflow and that will kill your fire. With these four things in mind, you’ll be grilling stronger, longer and cleaner than ever before!
Grilling 101: How to Prevent Food from Sticking to the Grill

When you are grilling, there's always a little bit of pressure. It's not like cooking in a kitchen where you can control the temperature of the oven or stove within a few degrees. You're working with a grill that can sometimes be unpredictable depending on the weather and you're also dealing with direct fire. One of the most embarrassing things that can happen is having your food stick to your grill. Not only are you creating a giant mess to clean up later, the food itself looks like it's been ravaged by wild dogs. It might taste delicious, but everyone will be looking at it sideways. I mean, no one wants to eat food that looks like it's already been chewed to death. Don't make this rookie mistake, BBQ peeps. Know your Grilling 101 tips and never deal with food sticking to the grill again! Just watch the video below and you will have delicious, tasty food hot off the grill, looking pretty as a picture every time.
[vimeo 174374354 w=640 h=360]
How to Prevent Food From Sticking to the Grill from Pig of the Month BBQ.
Grilling 101: Everything You Need To Know About Smoking Woods (Including Food Pairings!)

To be a true grill master, you have to know your stuff. One of the big ones that you have to know comes down to your wood. Get your mind out of the gutter! We’re talking about smoking woods here. Come on now… ;) Woods can vary from mild to strong in flavor, and you have to know your woods to know what to cook with them. Some woods can overpower the food with their smoke and some woods aren’t strong enough to stand up to the cut of meat, like a big ol’ hearty brisket for example. Today we're sharing everything you need to know about smoking woods. Check out our comprehensive guide to smoking with all of our favorite smoking woods below... First up on the education list, it's time to get to know the flavor profiles! You have your mild fruit woods such as apple, peach, cherry and pear that are light, fruity and sweet. These tend to burn hot and can vary between slow and quick burning times. Take a step up the scale to hickory next. It’s sweet and strong, heart and burns hot and slow. Then you’ve got maple which is sweet and light, on the milder end of the scale and burns hot and slow. Pecan and oak are more medium smoking woods, burning hot and slow. Finally, we wrap our list up with mesquite which is the big kahuna, so to speak. It’s bold with lots of smoke, and burns hot and fast. Now that you’ve gotten the cliff notes to smoking woods, check out what to use them with this summer. From meat to poultry to fish, you've got the ultimate pairing list below to become a pro in no time. Share what you're planning on making next in the comments below!

Smoke it up grill masters!
Grilling 101: The Best Tools & Grills You Should Buy Now

The ultimate question from anyone hoping to become a grill master this summer is... what kind of tools and grill should I be using? With all the tools and grills out there, both good and bad, it can be tough to know which ones you should be investing your money in. As grilling pros (not that we are trying to brag or anything), we want to make your grilling lives easier. So we're rounding up the top tools and grills on the market right now to make your decision-making process a bit easier. All the essentials are here! It doesn't matter if you are a seasoned grilling pro or just starting out, this roundup of tools and grills is the one guide you should be reading this summer. It's about time you finally invested in some good tongs isn't it...? The answer is yes. It's always yes. Who's ready to spend a little cash? It's all for a worthy cause... Delicious, juicy BBQ.
Best Grilling Tools
You can't start off a roundup of grilling tools without some reliable tongs. These OXO Good Grips Tongs are sturdy and will stand the test of time, without breaking the bank.
Yes, you need to actually clean that grill. We know it's a pain, but no one wants to eat meat that tastes like the shrimp you grilled last night. Grab this Weber brush and thank us later.
Brushing those ribs with sauce? Use this bomb extra long OXO Silicone Basting Brush for maximum coverage.
In our top grilling questions roundup, we told you the benefits of using a chimney starter versus lighter fluid. This Weber Rapidfire Chimney Starter will get things heating up fast.
If you are never sure when those steaks hit medium rare, skip the fuss and use this handy ThermoPro Wireless Remote Meat Thermometer. Yep, you read that right - it's wireless.
Know a wannabe grill master or simply want to have them all to yourself? Snag this Cuisinart Stainless-Steel Grill Set or this BBQ Grill Tools Stainless Steel Set and you'll be set for life.
A grill master would never be caught without his/her skewers. These X-Chef Stainless Steel Skewers are the BOMB.
Have all the essentials now? Great! Top it all off with some Cedar Grilling Planks to hit some next level grilling this summer.
Best Grills
All of these grills are seriously killer when it comes to getting the most bang for your buck. You've got top of the line down to more moderate options here, for both gas and charcoal. Take a look at each and decide which one is right for you! All we know is, if you don't have a grill or want an upgrade, there's no better convincing that a pile of tasty barbecued meats.... Can you see it? We sure can.
Char-Broil Classic 4-Burner Gas Grill
Weber Original Kettle Premium Charcoal Grill
Napoleon Rodeo Charcoal Kettle Grill
Weber Performer Deluxe Charcoal Grill

Lodge Pre-Seasoned Sportsman's Charcoal Grill
Disclosure: This posts contains affiliate links. If you purchase a product through an affiliate link, your cost will be the same but Pig of the Month BBQ will automatically receive a small commission. As always, we love your support!
Grilling 101: The Best Way to Make Juicy Grilled Chicken

You know that magical juicy chicken you dream of getting hot off the grill in your very own backyard? It ain't as easy to make as you think. We hear it all the time - "how do I grill chicken breasts and keep them moist?" "Is there any way to avoid dry chicken? Help!" You asked BBQ-loving peeps and we are here to answer your grilling prayers. Just follow the crazy simple steps below and boom, just like that you'll be the envy of the entire neighborhood. Get that grill master cap ready...

First, use the bottom of a wide jar or glass (or even a small skillet) to flatten those chicken breasts in an even thickness. You don't need to pound them to super thin cutlets, just make them even. Now, brine that bird! Even a mere 30 minutes in a salty brine or marinade will make all the difference - plus you need time to fire up the grill anyway 😉

An easy brine is super salty water with a dash of black peppercorns will do the trick, or go fancy with a marinade for a couple of hours. Either way, make sure you are letting the chicken rest in the brine or marinade for at least 30 minutes.

Once the grill is hot, oil it up and grill the chicken breasts over medium high heat, approximately 350 to 425 degrees. Make sure they are over direct heat and grill them for just a few minutes per side. Fast and hot gives you a good sear and keeps the meat nice and juicy. When the meat reaches 155 degrees, remove it from the heat and let it rest. Don't worry, it'll keep cooking and reach that safe zone of 165 degrees while it rests. Just don't cut it too soon or you'll lose those tasty juices! Serve with any Pig of the Month BBQ sauce, chimichurri, or salsa. Happy grilling folks!
Grilling 101: What Temperature Do I Grill That At?

Becoming a grill master is everyone’s goal during the summer. You want to be the man/gal with the plan when the grill is firing up and all those tasty meats, veggies and fruits are heading for those killer grill marks. If you are hoping to be a better griller this summer, the first thing you have to master is the heat of your grill. Every grill can be different, but the real key isn’t nailing a specific temperature, it’s getting the foods on the grill in the right order. Slamming some delicate fish on a blazing hot grill isn’t going to give you that flaky tastiness you want, just like throwing a steak on indirect heat isn’t going to deliver the juicy, tenderness. Feeling overwhelmed yet? No worries, we’ve got you covered. Here’s the complete guide to knowing exactly what temps the top grilling foods need to hit the grill at.

Fire up those grills, ladies and gents. You GOT this.
Grilling 101: Top Questions Answered!

If you’re anything like us, you’re already busting out the charcoal and grilling ALL the things. Whether you are grilling up ribs, veggies or a whole lot of burgers and hot dogs, there’s nothing better than the smell of burning coals and smoke. We get all sorts of grilling questions every year, from gas or charcoal preference to how to clean the grill. So this year we’re going to be covering a ton of grilling recipes, techniques and tips and tricks throughout the summer! To kick things off, we’ve rounded up our most-asked grilling questions. Before you fire up those grills again, get to know your stuff!

What’s better gas or charcoal? This is the ultimate grill question we get! There are a few factors that come into play to help you decide. First, price. Gas is more complicated and will cost more because of all the moving pieces inside the grill. Charcoal is a simpler grill so it will always be substantially cheaper. Second deciding factor? Taste. Gas burns clean so you’ll get the char marks, but you won’t get any special flavor in your food like using charcoal will get ya. Of course, gas grills will get to temperature faster and charcoal grills tend to take a long time to get hot. Gas grills are also a lot easier to clean up since charcoal grill cleaning can send ashes scattering all over the place. That’s a lot of back and forth, you guys. Yea, we know. If you want our honest opinion, charcoal always wins out when it comes down to it. You get better flavor, better heat management and you aren’t forking over as much money. When in doubt, go with the coal. Do I need to preheat my grill? YES. You need to preheat your grill whether you are using a gas or charcoal grill. A good rule of thumb is about 15 minutes for high temperatures (i.e. for searing) or 10 minutes for lower temperatures (i.e. for fish and such). Getting that preheat done before you start grilling the food will also help remove some of the residue left on the grill from past cooking.

How do I season my new grill? Oooohhhh look at you with your new killer grill! You are probably itching to get to grilling, but you have to season that baby first. No one wants the new grill residue on their food, trust us. Start with a cold grill and rub all the cooking surfaces down with canola oil. Wipe off any excess oil with a paper towel and light the grill. Let the grill heat up for about 15 minutes, or until the oil starts burning off and smoking. At this point the shiny finish that came with the grill should be turning dark brown or bronze. Turn off the grill and once coal, add a light coat of oil. To keep your grill in tip top shape, repeat this last light oil application step after each time you grill. Why you should never ever use lighter fluid...ever It’s all about the taste and smell. If you use lighter fluid, you’re going to get all those chemicals on your food. It’s really pointless to use lighter fluid when you can use a chimney starter so easily. Plus no one wants to smell like lighter fluid all day. Yuck.

How do I deal with flare-ups? First, get that food off the grill so it doesn’t get charred to oblivion. Then cover it up and wait it out. Flare ups survive off of the oxygen in the air so if you can smother it with the lid of the grill, do that. No matter what you do, DON’T squirt a water bottle on a flare up. It will get an ashy mess everywhere and it doesn’t actually subdue the flare. Be sure to keep an extinguisher nearby though… Just in case. Keep checking the blog for new Grilling 101 features throughout the summer. Your grill master status depends on it.
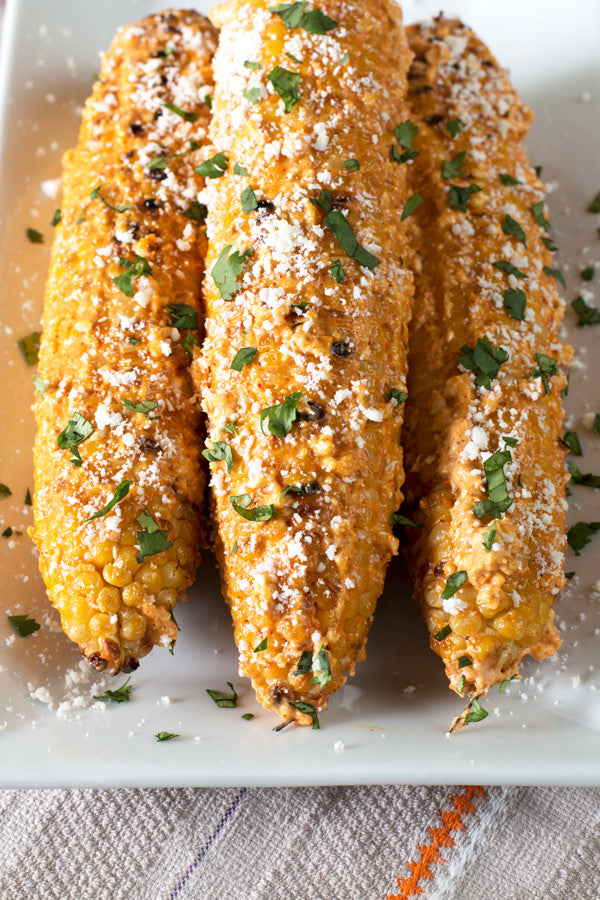
Don’t forget to check out our featured grilled recipes!


Grilled Chili Rubbed Flank Steak


Lemon Pepper Bacon Wrapped Shrimp Skewers
Recipes & recipes photos by Meghan Bassett


