Posts tagged: garlic
Pulled Pork Flatbread with Mango Chutney
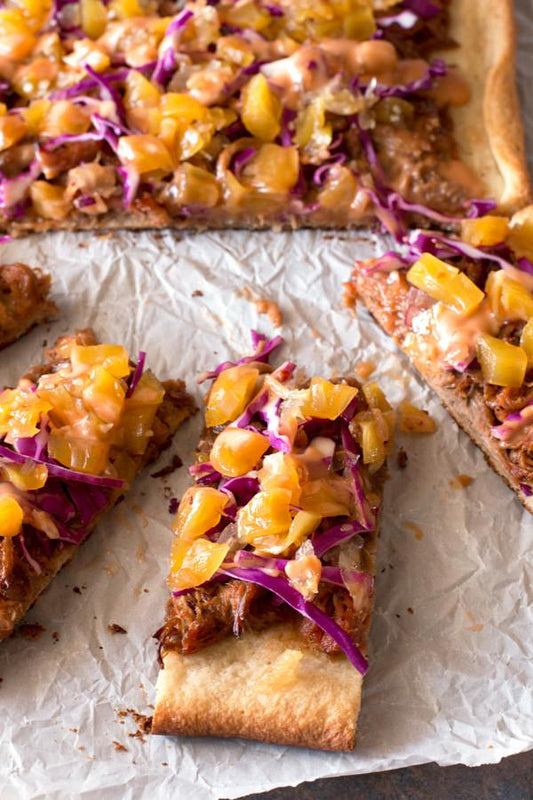
This is officially my new favorite way to devour pulled pork. I’m serious, I can’t even begin to convey how much I love this flatbread. All of the layers of flavors on top of a perfectly crisp flatbread makes this dish a must have for anyone who loves pulled pork.
Hearty Guinness BBQ Brisket Stew
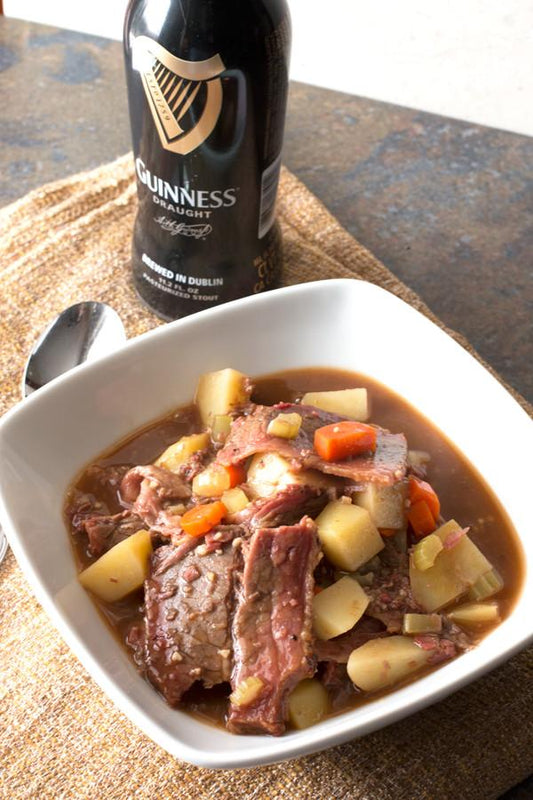 There’s nothing like a Guinness stew on a cold day. Unfortunately a traditional Guinness stew can take a bit of time, which I rarely have on weeknights, especially after battling traffic in snow during rush hour. With this recipe in less than 30 minutes, you’ll have a delicious stew that will warm you up inside and out!
Corned Beef and Cabbage Empanadas
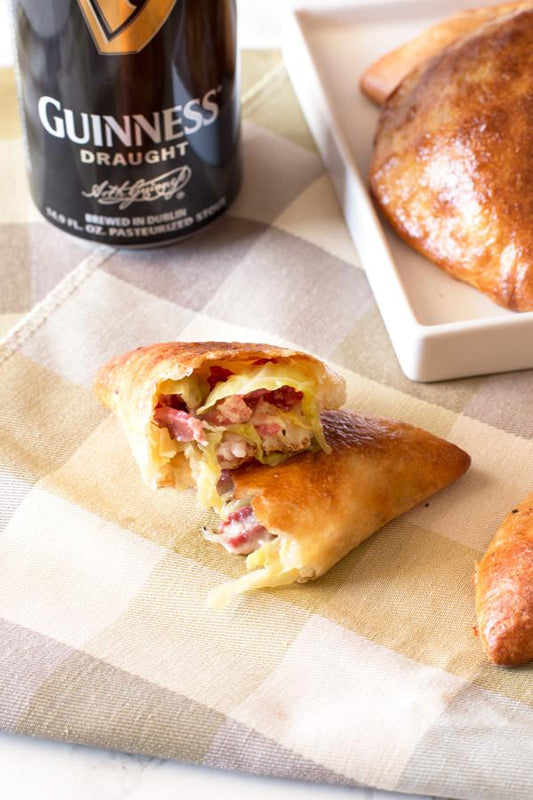 Corned beef and cabbage is a staple for us on St. Patrick's Day. No matter what, we always either make it or go out to eat it on St. Patrick's Day. It's become a great tradition, but this year I wasn't getting too excited about whipping out the same recipe for another year. This is exactly why I want to change things up this year and make something fun and playful!
Bacon & Beer Smoked Mussels
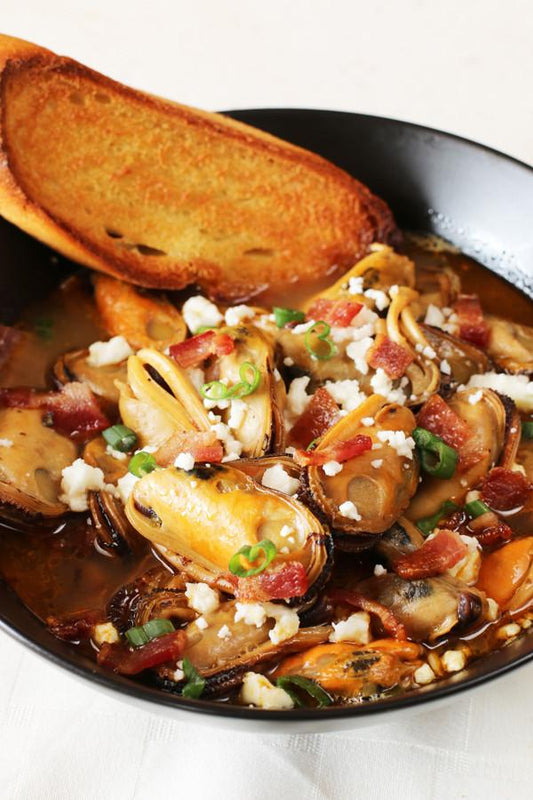 The only things that can make mussels better are beer, bacon, and smoke. Isn't it nice when it all comes together for you in one big bowl of smoky, spicy flavors? I love eating mussels for dinner during the week because it's packed with protein and comes together so quickly. The new smoked mussels from Pig of the Month make it even easier for you because they eliminate the need for soaking and cleaning the little guys!
Pull Apart Bacon Garlic Cheese Bread
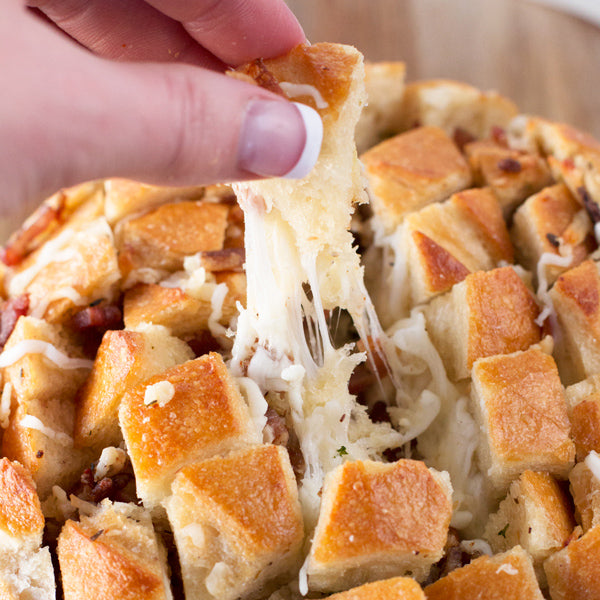
I'm about to blow your minds with some serious bacon and cheese action. You may think that it couldn't get any better than the fried mac n cheese we busted out earlier this week, but we just outdid ourselves. Yet again.

Pull apart breads are my new favorite recipe to whip out for a party, especially a huge spread like the one I'm hosting on Super Bowl Sunday in a couple weeks. This bread is so ridiculously simple, there's really no excuse for you to NOT make it. In about 5 minutes of prep time, you'll be a hot 15 minutes away from a cheesy, bacon-packed mess of a bread that everyone will gladly get messy for. Just take a gander at that cheese....

Ok one more... All that cheese and bacon stuffed into the cracks of that warm, crusty bread...

Enough torture, I promise. But seriously, can't you just taste the deliciousness that this cheesy, bacon bite must pack? Are you hungry yet?


INSTRUCTIONS: Preheat oven to 350 degrees F. In a small bowl, stir together melted butter, garlic, salt, pepper, parsley, thyme and oregano. In another small bowl, combine the two cheeses and bacon. Gently toss to combine.

Using a serrated knife, cut the bread on a diagonal angle into 1-inch diamond shapes, making sure you don’t slice all the way through the loaf of bread.

Gently open up the cracks with your fingers. Drizzle each with a tsp of the butter mixture and a pinch of the cheese and bacon mix.

Wrap the loaf of bread in aluminum foil and bake for 15 minutes, until the cheese has mostly melted. Remove from the foil and bake for an additional 5 minutes, directly on the rack. Serve immediately.
Shop This Post
Pig of the Month Applewood Smoked Maple Bacon

Recipe & Photos by Meghan Bassett
Spicy Dry Rub Ribs
Spicy Dry Rub Ribs are smoky and spicy, perfect for your next BBQ gathering! The ribs come out extra tender and juicy, hot off the grill and finger-lickin' good.

It's finally grilling season! Is anyone else as excited as I am about this? I've been busting out the grill almost every single night for dinner and I gotta tell you, that grilled charcoal flavor is what I've been missing since Labor Day. Chicken, vegetables, burgers, steaks, I've been grilling it ALL.

Recently though, I've been obsessed about perfecting dry rub ribs on the grill. I've baked them more times than I can count, but nothing gets that BBQ flavor packed into the ribs like a grill. These ribs are the best combination of spicy and smoky on the outside, with perfectly tender and juicy meat on the inside. Seriously, the meat practically melts in your mouth with every bite.

Your next BBQ NEEDS these ribs. Or even your next weeknight meal! Rub the ribs down and wrap 'em up before you head to work in the morning, then just throw 'em on the grill when you get home. You'll have grilled up ribs in under an hour that'll curb all those BBQ cravings you've been having lately.


INSTRUCTIONS: In a medium bowl, stir to combine salt, brown sugar, paprika, garlic powder, onion powder, chili powder, cumin, black pepper and cayenne pepper.

Rub down the racks of ribs with the dry rub evenly. Wrap the racks in plastic wrap and let rest in the refrigerator for at least 2 hours.

Heat up your grill to 350 to 400 degrees and rub the grill racks with olive oil. Remove the ribs from the plastic wrap and place directly on the grill. Cook for 40 minutes, turning occasionally, until crispy and cooked through.

Allow the racks to rest 10 minutes before cutting into them and serving.

Recipe & photos by Meghan Bassett
Grilled Chili Rubbed Flank Steak
Grilled Chili Rubbed Flank Steak is a super simple way to take your grilled steak to the next level of flavor. The wet rub infuses so much tastiness into the flank steak - you can't go wrong with this one!

Are you ready for Memorial Day?? I am tweaking my menu daily for the annual massive BBQ I host, and I was feeling a little stumped earlier this week. That is, until now. This grilled chili rubbed flank steak changed ev-er-y-thang for me once I made it. It's one of the simplest recipes I've ever created, but in terms of flavor, it's ridiculously complex. All of the flavors in the rub perfectly compliment the meat and that really good charred taste you get from the grill.

You can easily serve this bad boy as is or there are about a million other ideas you could try out. Throw it on a salad. Chop it up and add it to a grilled pizza. Serve it with tons of grilled veggies. You can even make some killer tacos or a Tex Mex inspired sandwich with this meat. The options are limitless and it'll take you less than 15 minutes of active cooking time to make it happen.

So obviously, you should be adding this recipe to your Memorial Day menu right NOW.


INSTRUCTIONS: In a small bowl, combine garlic, lime juice, chili powder, salt, cumin, paprika and cayenne.

Stir until all ingredients are incorporated.

Rub the paste all over the steak. Let rest in the refrigerator for 15 to 20 minutes.

Grill the steak on a hot grill or grill pan over medium-high heat until it reaches your desired doneness (approximately 6 to 8 minutes for medium). Remove from grill and rest for at least 10 minutes before slicing and serving.

Serve alone over rice, with salad or even in tacos! Give it an extra squeeze of lime for a touch of extra brightness too. Recipe & photos by Meghan Bassett

