Posts tagged: BBQ appetizer
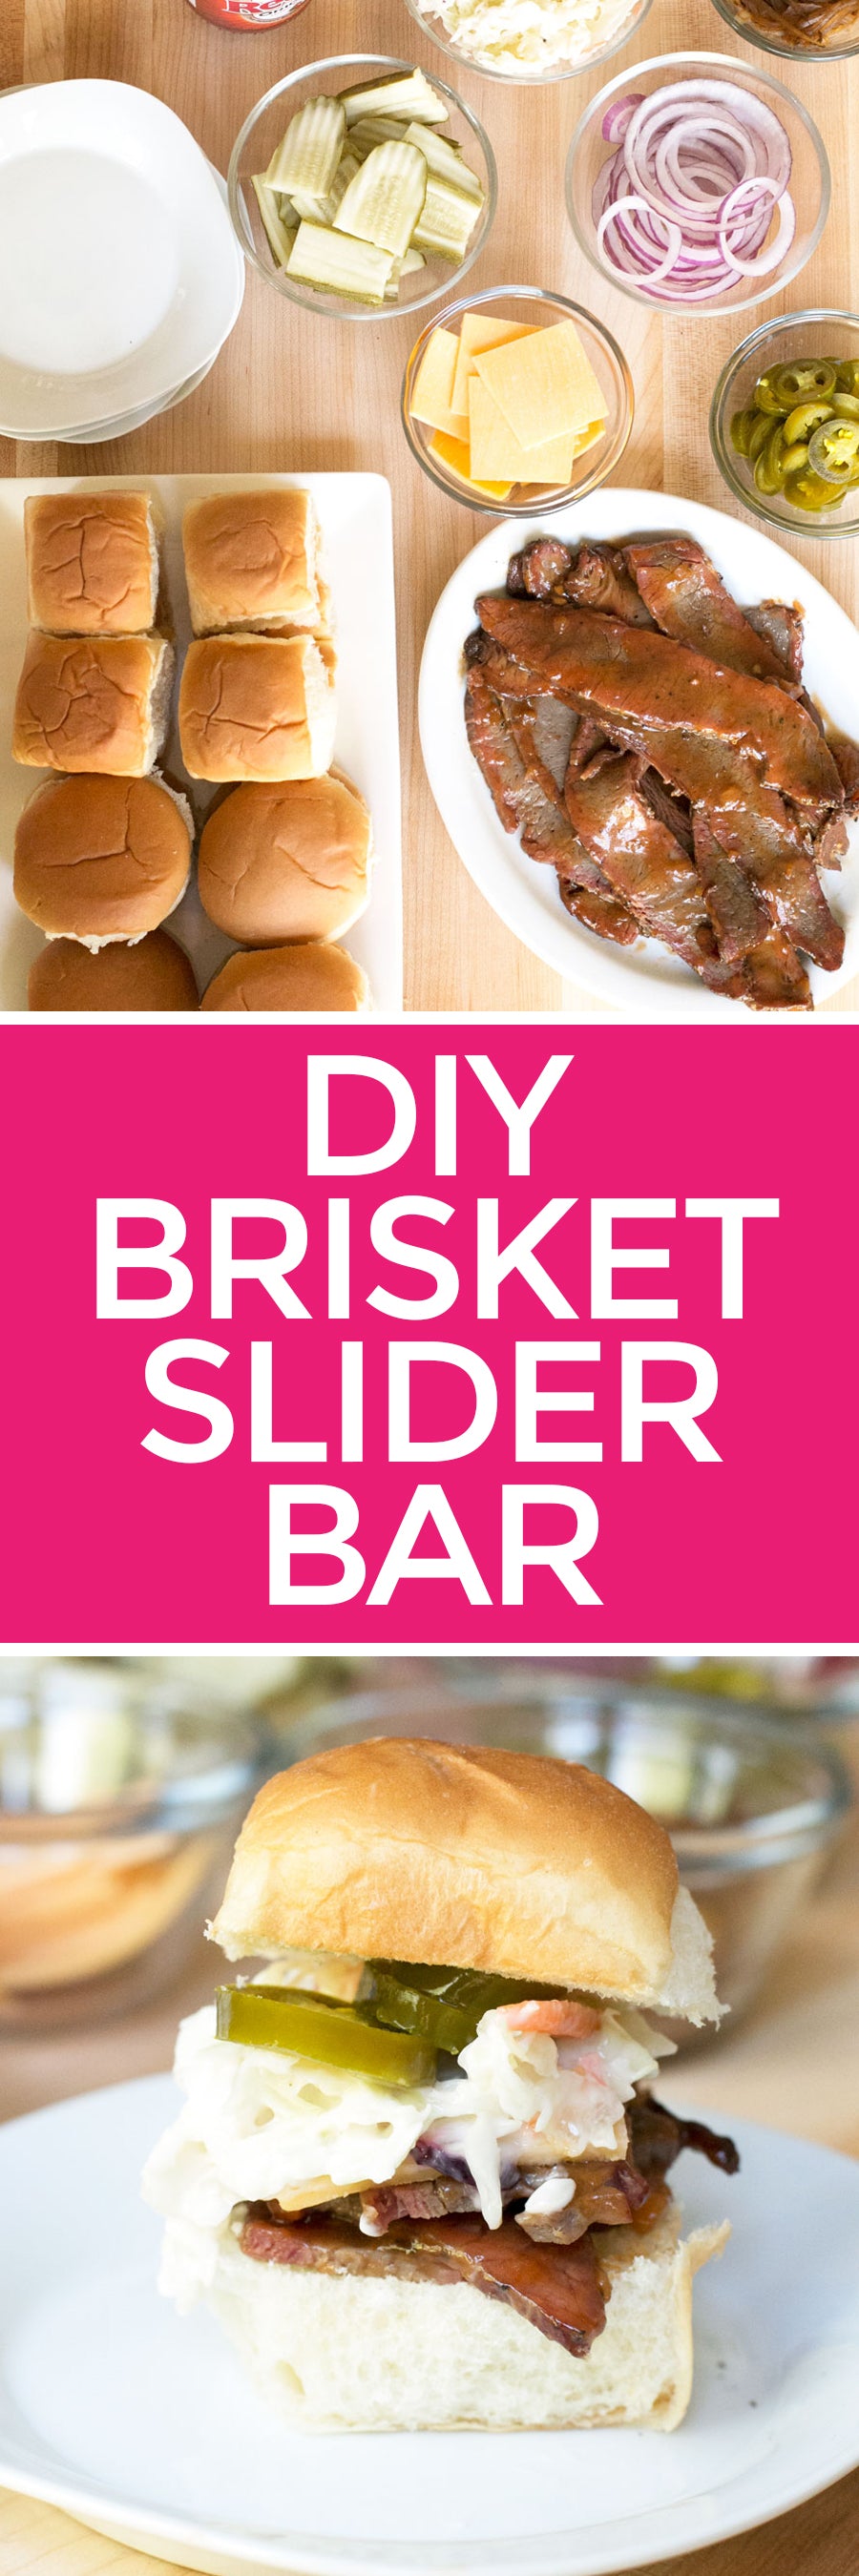
DIY Brisket Slider Bar
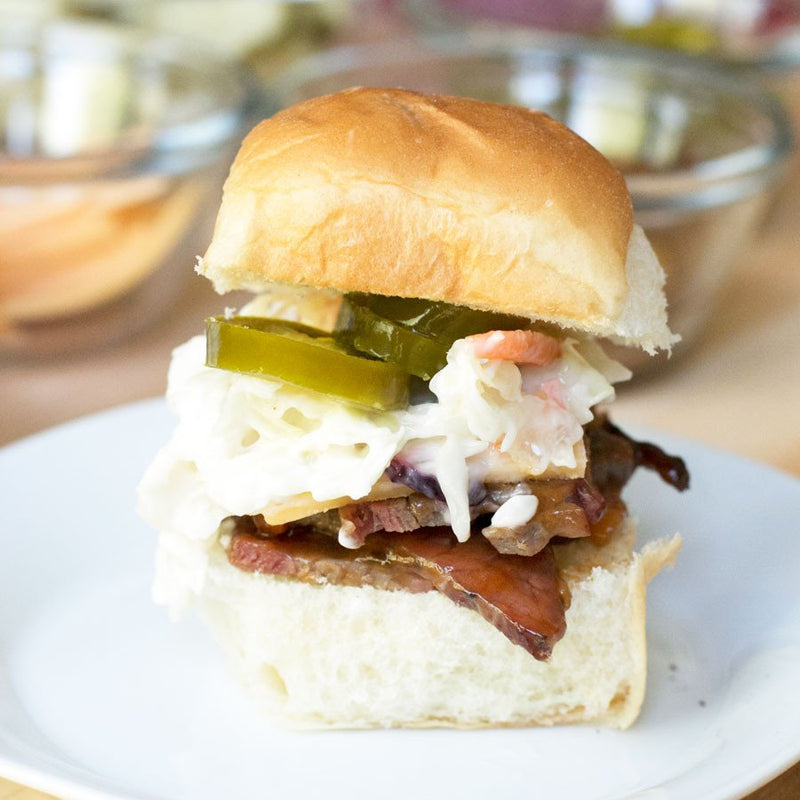

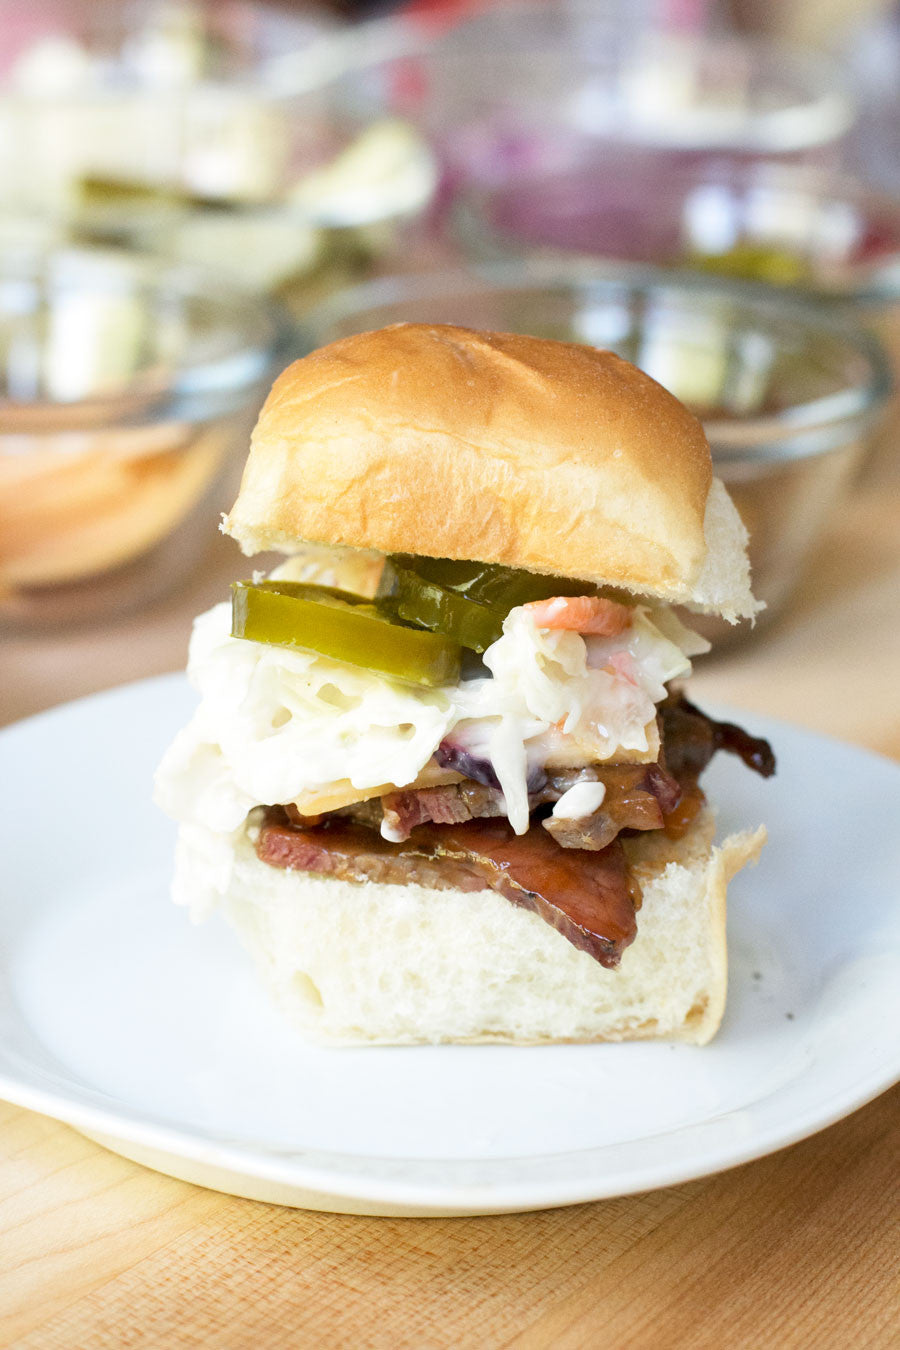
Stop trying to make the perfect sliders for everyone and have them make their own instead! Put the fun back into your food at your next gather with this super simple DIY Brisker Slider Bar. Instead of slaving away, trying to find the ideal slider that everyone will fall in love with, load up on some of our brisket and set out as many toppings as you can. All you guests will love jumping in to create their own version of the "best brisket slider", plus you can keep the options open no matter what foods some people love (or love to hate).

You can stick with a classic combo of a white bun, brisket, pickles, red onion and cheese.

Or shake things up with a Hawaiian bread bun, coleslaw and pickled jalapeños!
Not to mention all the stress this whole DIY slider bar takes off you as the host/hostess... But that's just an extra side bonus to everything loving the food and having fun, right? ;)
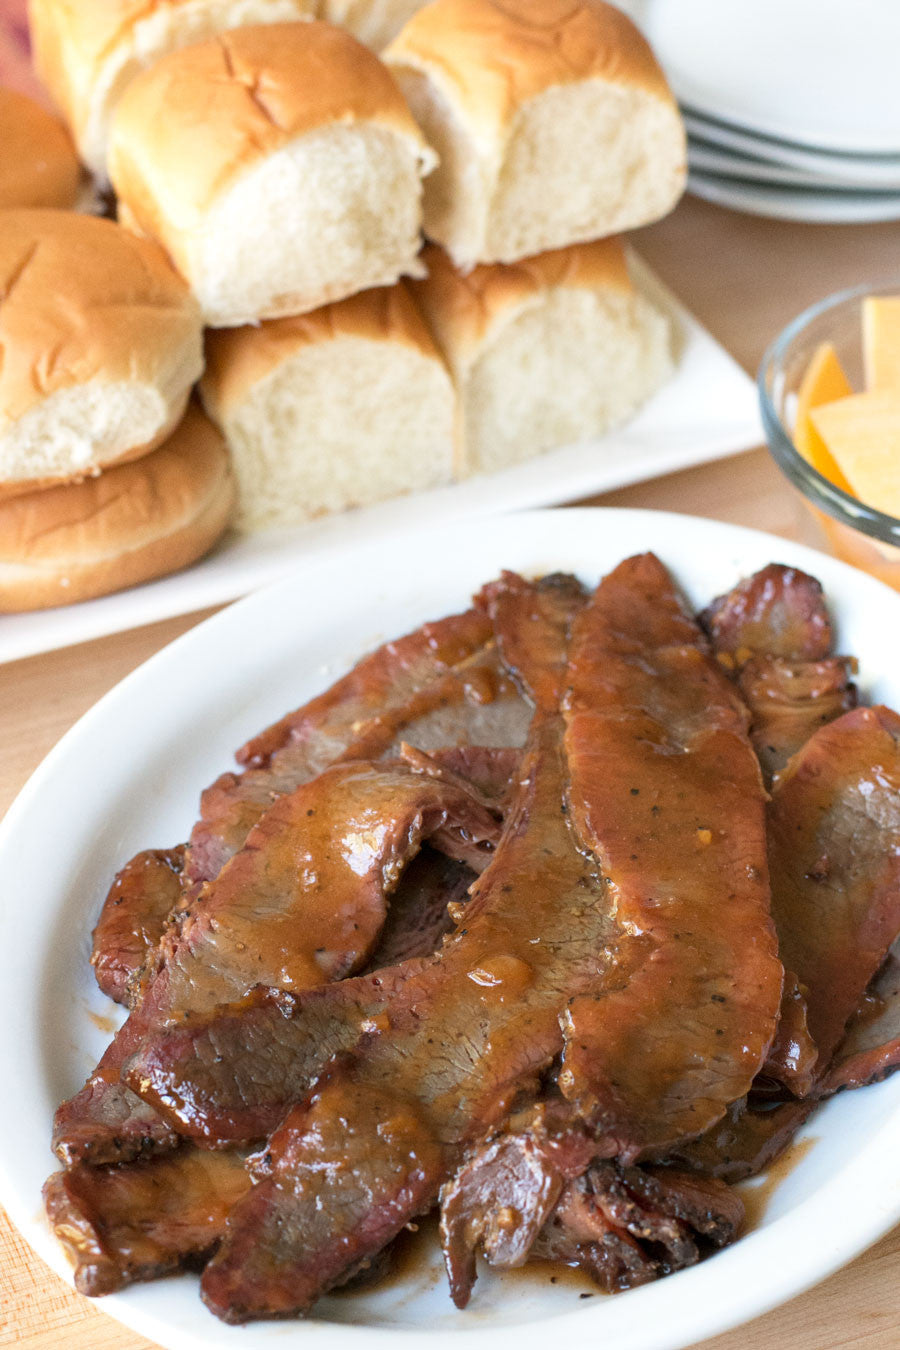
What You'll Need: Serves 12 to 14 2 types of slider buns (24 total) 1 lb Pig of the Month Brisket, warmed 1 red onion, thinly sliced 2 cups coleslaw 1 cup caramelized onions Sliced sharp cheddar cheese, cut into small squares Sandwich pickles Pickled jalapeños BBQ sauce Franks Red Hot Sauce

Place the buns on a large platter. Place warmed brisket on a separate large platter. Layer cheddar cheese slices on a small plate.

Add red onion, coleslaw, caramelized onions, sandwich pickles and pickled jalapeños to individual serving bowls. Place the buns to one side next to the brisket and then lay out all of the toppings in a line to make it easy for guests to pick and choose. Set out your favorite BBQ sauces and hot sauces for people to experiment with! Have fun with it!
Shop This Post
*Recipe & Photos by Meghan Bassett
Open-Faced Pulled Pork Sliders (Revisted)

A couple of years ago, we served up a quick go-to appetizer of open-faced pulled pork sliders. We've been using this recipe ever since, but we decided it was about time to make a little update to this bad boy. Why not get on the food porn train and really blow your minds? So we broke out the waffle iron, all the cheese and piled on even more saucy pulled pork for this revisited version of an old fav.

This open-faced slider is the perfect combination of savory, spicy and sweet. Instead of being sandwiched between a bun, this pork sings with the crunchy, spicy coleslaw and the crisp waffle fry. I promise your mouth will be bursting with flavor! These sliders are the perfect opening bite to start your summer BBQ festivities with a bang. You get a little bit of everything you could ever want in each loaded bite!

Any excuse to get extra saucy at a BBQ, am I right? Happy BBQing, piggy fans!
Open Faced Pulled Pork Sliders from Pig of the Month BBQ.

INSTRUCTIONS: Heat up a waffle iron and grease with cooking spray. Add the shredded hash browns in batches, creating the base for your sliders. Remove once golden brown and crispy. Cut the hash brown waffle into 4 pieces. Top each piece of hash brown waffle with one slice of sharp cheddar cheese. Broil until melted. Set aside. In a small bowl, combine coleslaw, mayonnaise, lemon juice, salt and pepper. Stir until coated evenly. Warm the pulled pork in the microwave and stir in more BBQ sauce as desired. Top the cheesy hash brown waffles with pork and top with coleslaw. Serve immediately. Shop This Recipe: Pig of the Month BBQ Pulled Pork Pig of the Month BBQ Sauces Recipe, photos & video by Meghan Bassett
Bacon-Wrapped Onion Rings

Boring old fried onion rings are sooooooo yesterday. No one needs all that greasy breading. Instead, you need all that greasy, crispy BACON. These bacon-wrapped onion rings are the only way you should be eating your onion rings from now on. Everything is better with bacon, you all know that! These onion rings might look a little intimidating to make, but they are so much easier than dragging out the fryer and going through the batter process normal onion rings require. Instead just wrap these bad boys up and bake until they are crispy and delicious. No possible oil burns and no risk of a grease fire. Which for someone as clumsy as myself is a serious MUST.

The hint of BBQ sauce and smoky flavor of the bacon give new life to onion rings that is downright addictive. Trust me when I say you won't regret diving into a bowl of these savory rings of bacon-wrapped onion rings (aka serious deliciousness) for a second; and if you do, hand them over, I'll finish off the rest for you.


INSTRUCTIONS: Preheat oven to 400 degrees F. Line with foil and place rack on baking sheet.

Brush the onion rings with BBQ sauce, then carefully wrap in bacon. Start by wrapping one end of a bacon slice snuggly around the onion ring so it just slightly overlaps itself. You’ll use about 1 1/2 to 2 slices of bacon per onion ring.

Place the wrapped onion rings bacon-end side down on the rack and bake for 20 minutes. Flip the onion rings and bake another 15 to 20 minutes. Finish the onion rings with a few minutes under the broil if you like crispier bacon. Remove from oven and rest at least 5 minutes. Serve with more BBQ sauce if desired.

Shop This Post Pig of the Month BBQ Applewood Smoked Maple Bacon Recipe & photos by Meghan Bassett

